CNC Grinding Machine Coolant and Enclosure Troubleshooting Guide
Diagnose and fix CNC grinding machine enclosure leaks, coolant pressure drops, and mist extraction issues with this expert troubleshooting guide.
Diagnosing CNC Grinding Machine Enclosure and Coolant Failures
CNC grinding machines operate under extreme thermal and particulate loads. Unlike milling, grinding generates microscopic swarf that easily bypasses standard enclosure seals, while the sheer friction demands high-volume, temperature-controlled coolant. When a precision grinder like a Studer S33 or Blohm Profimat experiences enclosure breaches or coolant starvation, the result is immediate thermal spindle growth, way wear, and scrapped micron-level tolerances. This guide provides actionable troubleshooting protocols for coolant delivery, thermal management, and enclosure sealing systems.
⚠️ Safety Warning: High-pressure coolant systems on modern CBN grinders operate between 40 and 80 bar (580–1160 psi). Never inspect high-pressure nozzles or lines while the pump is energized. Hydraulic injection injuries can occur at pressures above 10 bar.Coolant Pressure Drops and Flow Starvation
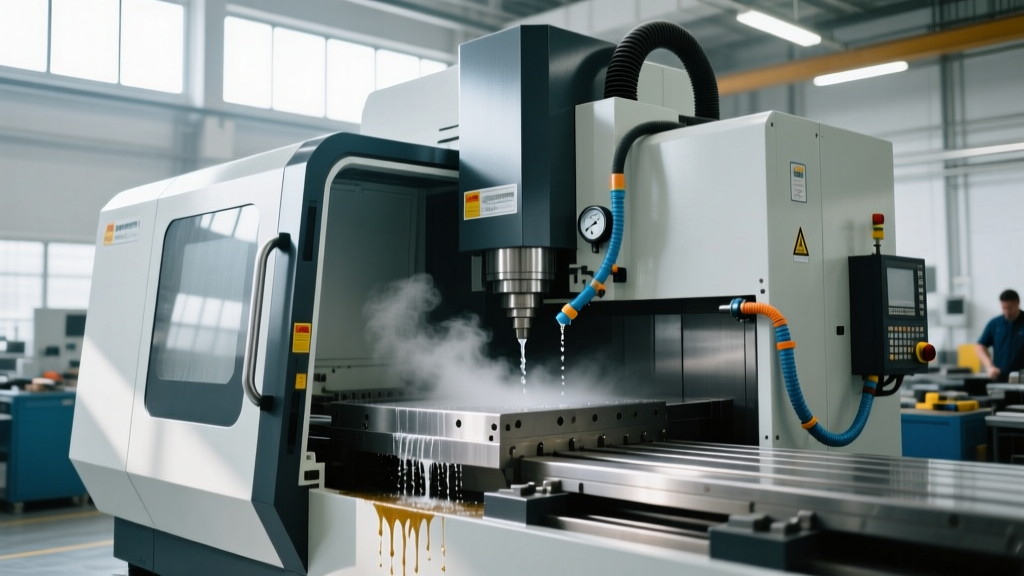
Modern grinding operations utilizing CBN (Cubic Boron Nitride) or diamond wheels require high-pressure coolant to penetrate the air boundary layer surrounding the wheel. If your machine alarms out on low coolant flow, or you notice burning marks on the workpiece, follow this diagnostic tree.
1. Band Filter and Vacuum Switch Diagnostics
Most CNC grinders use automatic band filters (e.g., Knoll or Brinkmann systems) paired with a vacuum switch. As swarf builds on the filter media, the fluid level drops, increasing the vacuum in the dirty tank.
- Symptom: Coolant pump cavitates; filter drive motor fails to index.
- Diagnostic Test: Check the vacuum switch setpoint. For standard 30-micron polyester media, the switch should trigger at -25 to -35 mbar. If the switch is stuck open due to swarf intrusion in the sensing tube, the filter will not advance, leading to starvation.
- Fix: Purge the vacuum sensing line with compressed air. Replace the diaphragm switch if it fails to click at the calibrated pressure (replacement cost: $120–$180).
2. High-Pressure Pump Wear and Bypass Valve Failure
If the main tank is full and the filter is clear, but nozzle pressure remains below 20 bar, the issue is likely internal pump wear or a stuck bypass valve.
- Symptom: Low pressure at the grinding zone; high-pitch whining from the pump housing.
- Diagnostic Test: Isolate the pump by closing the main discharge valve and reading the pressure gauge. If deadhead pressure does not reach the pump’s rated maximum (typically 80-100 bar for positive displacement pumps), the internal gear or piston seals are worn.
- Fix: Rebuild the pump head. Expect to spend $1,800 to $3,500 for OEM seal kits and labor on a 20HP high-pressure unit.
Enclosure Seal Degradation and Way Cover Failure
Grinding swarf—especially from hardened steels and carbides—acts as a microscopic lapping compound. When it breaches the enclosure and reaches the linear guideways or ball screws, it causes catastrophic abrasive wear. According to the Norton Abrasives grinding fluid knowledge base, proper fluid application and containment are critical to preventing wheel loading and machine contamination.
Telescopic Steel Covers vs. Polyurethane Accordion
Machine builders select way covers based on axis speed and swarf type. Troubleshooting these requires knowing the material limits.
| Cover Type | Best Application | Common Failure Mode | Repair / Replacement Cost |
|---|---|---|---|
| Telescopic Steel | Heavy cast iron/steel grinding, high-velocity swarf | Wiper blade tearing, slide bearing seizure | $1,200 – $3,800 per axis |
| Polyurethane Accordion | Carbide tool grinding, dry or mist environments | Material puncture from sharp carbide burrs | $450 – $900 per cover |
| PVC/Aluminum Roll-up | Z-axis spindle heads, low-impact zones | Spring tension loss, strap snapping | $250 – $600 per unit |
Pro Tip for Wiper Blades: If you are replacing wipers on telescopic covers, upgrade from standard Nitrile (Buna-N) to Polyurethane. Polyurethane wipers cost roughly 30% more upfront but offer 3x the abrasion resistance against sharp carbide and hardened steel swarf, significantly extending the interval between enclosure leaks.
Thermal Control: Chiller and Heat Exchanger Troubleshooting
Precision grinding demands extreme thermal stability. The coolant temperature must be maintained at 20°C ± 0.2°C (68°F ± 0.36°F) to prevent thermal expansion of the workpiece and machine spindle. If your chiller (e.g., Single Temp or MTA) is short-cycling or failing to hold tolerance, the issue is almost always in the heat exchanger.
Descaling Plate Heat Exchangers
- Isolate the Chiller: Close the bypass valves on the coolant loop to prevent contaminating the main machine tank.
- Prepare the Acid Bath: Mix a 15% phosphoric acid solution with water. Never use hydrochloric acid, as it will aggressively attack the copper brazing in the heat exchanger.
- Reverse Flow Flush: Connect a small transfer pump to circulate the acid solution backward through the chiller's coolant circuit for 45 to 60 minutes. This breaks down calcium and mineral scale that insulates the plates and ruins heat transfer efficiency.
- Neutralize and Rinse: Flush the system with a mild baking soda solution, followed by DI (Deionized) water until the pH returns to 7.0.
Mist Extraction and Enclosure Negative Pressure
Grinding operations generate significant oil mist and aerosolized metalworking fluids. The OSHA Metalworking Fluids guidelines strictly mandate proper ventilation to prevent operator respiratory issues and facility contamination. A properly sealed CNC grinding enclosure must maintain a slight negative pressure to ensure mist does not escape when the operator opens the loading door.
Engineering Standard: To maintain effective containment, the mist collector (e.g., Losma or Filtermist centrifugal unit) must generate a negative pressure of -15 to -25 Pascals inside the enclosure relative to the ambient shop floor. Use a digital micromanometer to verify this during annual maintenance.
Troubleshooting Mist Collector Inefficiency
- Symptom: Oil film on the shop floor outside the machine; fogging inside the enclosure that obscures the camera view.
- Root Cause 1 (Filter Saturation): The coalescing filters in the mist collector are blinded with tramp oil and fine particulate. Replace the primary HEPA or multi-stage coalescing elements (Cost: $300–$600).
- Root Cause 2 (Enclosure Leaks): The negative pressure is pulling unfiltered air through degraded door seals rather than capturing the mist at the source. Inspect the magnetic door gaskets and replace any that show compression set or tearing.
- Root Cause 3 (Coolant Chemistry): High tramp oil content in the coolant reduces surface tension, causing excessive foaming and misting. Check the coolant concentration with a refractometer. For semi-synthetic fluids, maintain a 6-8% concentration. If tramp oil exceeds 2%, run the machine's integrated skimmer or deploy a portable centrifugal oil separator.
Step-by-Step Telescopic Way Cover Replacement
When an enclosure leak is traced to a collapsed telescopic steel cover, immediate replacement is required to protect the linear guideways. Follow this procedure for safe removal and installation.
- Support the Axis: Move the axis to the center of its travel. Place precision ground parallel blocks under the saddle to support the weight and relieve tension from the ball screw.
- Disconnect the Drive: Unbolt the cover's rear mounting flange from the machine casting. Disconnect the front flange from the moving saddle.
- Extract the Assembly: Telescopic covers are heavy and under spring tension. Use a nylon sling and an overhead crane or shop hoist to slide the cover out of the machine laterally. Never drag it across the way surfaces.
- Clean and Inspect: Thoroughly clean the linear rails and ball screw with a lint-free cloth and solvent. Inspect the rail blocks for pitting or swarf ingress. If swarf is found inside the ball nut, flush it with low-viscosity flushing oil.
- Install the New Cover: Slide the new cover (e.g., Hema or custom OEM equivalent) into place. Align the front flange first, torque to the manufacturer's specification (typically 15-20 Nm for M8 bolts), and then secure the rear flange.
- Verify Clearance: Manually jog the axis through its full stroke at 10% rapid override. Listen for metallic scraping, which indicates the cover is misaligned and binding against the machine casting.
Proactive maintenance of your CNC grinding machine's enclosure and coolant systems is not optional; it is the baseline requirement for holding sub-micron tolerances. By systematically monitoring vacuum switches, upgrading wiper materials, and maintaining strict thermal and negative-pressure parameters, you eliminate the primary mechanical variables that cause precision grinding failures.