Lithium Ion Battery Manufacturing Equipment: Relocation Troubleshooting
Expert troubleshooting guide for relocating lithium ion battery manufacturing equipment. Solve alignment, dry room, and calibration issues.
The Hidden Complexity of Battery Line Relocation
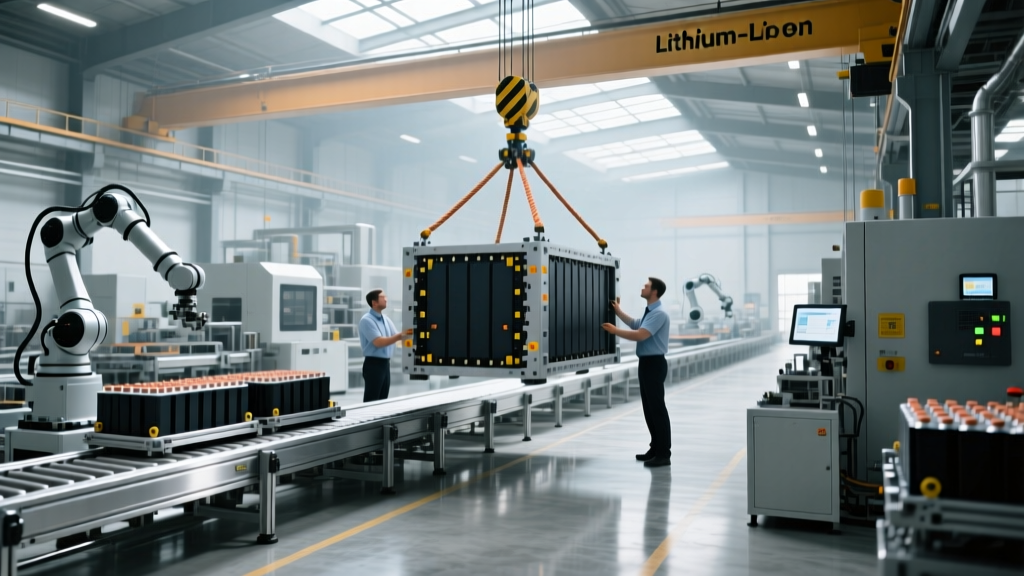
Relocating lithium ion battery manufacturing equipment is not a standard industrial rigging job. Moving a pilot line or scaling a gigafactory involves transferring highly sensitive machinery—where micron-level misalignments or minor environmental breaches can result in catastrophic cell failure, thermal runaway, or millions of dollars in scrapped electrode material. As global battery production capacity surges in 2026, many manufacturers are consolidating facilities or moving legacy lines to new gigafactories. This guide provides deep, actionable troubleshooting frameworks for the most common failure modes encountered during the decommissioning, transport, and reinstallation of battery manufacturing lines.
CRITICAL SAFETY WARNING: Before decommissioning any mixing or coating equipment, ensure all N-Methyl-2-pyrrolidone (NMP) solvent lines are purged with nitrogen and verified with a combustible gas indicator. Residual NMP vapor trapped in closed valves is a primary cause of flash fires during rigging and torch-cutting operations.Phase 1: Dry Room Environmental Integration Failures
The most frequent bottleneck in lithium ion battery manufacturing equipment installation is the integration of the machinery with the dry room HVAC system. High-nickel NMC and solid-state precursor lines require ultra-low humidity environments. If the dry room fails to reach specification, the electrode moisture content will exceed the 300 ppm threshold, leading to hydrofluoric acid (HF) formation during cell cycling.
Symptom: Dew Point Fails to Stabilize Below -45°C
After installing the desiccant rotor HVAC system and sealing the cleanroom panels, the room dew point hovers around -30°C instead of the required -45°C to -50°C.
- Root Cause 1: Equipment Outgassing. Newly installed epoxy floors, polyurethane conveyor belts, and equipment lubricants off-gas volatile organic compounds (VOCs) and moisture, overwhelming the desiccant wheel.
- Root Cause 2: Airlock Pressurization Imbalance. The personnel and material airlocks are not maintaining the required +15 Pa positive pressure, allowing ambient factory air to infiltrate.
- Corrective Action: Implement a 72-hour 'bake-out' protocol for the empty dry room before moving the lithium ion battery manufacturing equipment inside. Run the HVAC regeneration heaters at 140°C. For airlocks, recalibrate the variable frequency drives (VFDs) on the supply and exhaust fans to enforce a strict 50 CFM differential flow, ensuring positive pressure is maintained even during rapid door cycling.
Phase 2: Slurry Mixing & Extrusion Troubleshooting
Continuous mixing via twin-screw extruders (such as the Bühler BTSK series) has largely replaced planetary batch mixers in modern 2026 gigafactories. These machines are extremely heavy and feature precision-machined co-rotating screws with clearances as tight as 0.2mm.
Symptom: High Motor Load and Uneven Slurry Viscosity Post-Move
Upon restarting the extruder at the new facility, the main drive motor trips on high amperage, and the discharged slurry shows agglomerates and inconsistent solid content.
- Inspect the Gearbox Alignment: During transport, the torsional stress of uneven forklift rigging can shift the main gearbox relative to the screw shafts. Use a laser alignment tool (e.g., SKF TKSA series) to check the coupling. Tolerance must be within 0.05mm angular and 0.02mm parallel.
- Check Thermal Fluid Jackets: Extruders rely on closed-loop thermal oil jackets to maintain the slurry at exactly 35°C to 45°C. If the thermal oil was not properly drained and flushed before the move, sludge can clog the rotary unions. Flush the system with a low-viscosity heat transfer fluid and verify the delta-T across the barrel zones is less than 2°C.
- Verify Screw Element Sequencing: A common reinstallation error is reassembling the modular screw elements in the wrong kneading block sequence. Refer to the OEM CAD schematics; reversing a 60-degree stagger angle kneading block will destroy the dispersive mixing efficiency, causing the viscosity spikes.
Phase 3: Slot-Die Coating Web Tension & Roller Parallelism
The coating process is the heart of the cell. Slot-die coaters (like those from Hirano or Toray) apply the cathode and anode slurries onto aluminum and copper foils at speeds exceeding 80 meters per minute. Relocating these 20-meter-long machines almost always induces frame torsion.
Expert Insight: Never rely on the building's concrete slab as a reference plane for coater leveling. Gigafactory floors can have a 10mm drop over 30 meters. Always establish an independent optical leveling benchmark using an API Radian laser tracker, setting the machine's datum line to the laser plane, not the floor.Symptom: Edge Waviness and Coating Thickness Variance
The coated electrode exhibits edge wavy defects (baggy edges) and the beta-ray gauge shows a ±3µm thickness variance across the web width.
- Diagnostic Step 1: Roller Parallelism. Use a calibrated digital micrometer and a tensioned piano wire, or a portable coordinate measuring machine (CMM), to measure the gap between the drive roller and idler rollers at the extreme left, center, and right. The parallelism tolerance is strict: ±0.02mm over a 1200mm web width. Shim the bearing blocks using stainless steel foil shims until parallelism is achieved.
- Diagnostic Step 2: Load Cell Calibration. Tension load cells are highly sensitive to shock. If the web tension fluctuates on the HMI, the load cells may have been damaged during transit. Apply certified deadweights (e.g., 10kg, 25kg, 50kg) to the tension roller to verify the analog-to-digital conversion curve. Replace any load cell showing more than a 0.5% deviation from the linear calibration curve.
Relocation Tolerance & Environmental Matrix
Use the following matrix as a baseline checklist during the commissioning phase of your lithium ion battery manufacturing equipment. Falling outside these parameters will result in yield loss or equipment damage.
| Equipment Zone | Critical Parameter | Target Specification (2026 Standard) | Troubleshooting Tool |
|---|---|---|---|
| Dry Room (Electrode) | Dew Point | -45°C to -50°C | Chilled mirror hygrometer |
| Cleanroom (Winding/Stacking) | Particulate Count | ISO Class 7 (Class 10,000) | Laser particle counter |
| Slot-Die Coater Base | Foundation Vibration | < 1.2 µm/s RMS (VC-C curve) | Seismograph / Vibration analyzer |
| Winder Tension Control | Tension Variance | ± 1.5 N over full roll build | Calibrated tension load cell |
| Formation Deck | Busbar Voltage Drop | < 5 mV at max current | Thermal camera & millivolt meter |
Phase 4: Formation & Grading Power Electronics Calibration
Formation and grading systems (such as those from Neware, Arbin, or Hitachi High-Tech) cycle thousands of cells simultaneously, pushing massive DC currents through busbars. Moving these heavy, multi-tiered racks often loosens high-current connections and disrupts the precision sensing wiring.
Symptom: Channel Voltage Drift and Thermal Hotspots
During the initial dummy-load testing, specific formation channels show a 15mV drift compared to the master reference, and thermal imaging reveals glowing hotspots on the DC busbars.
- Torque Verification: Every high-current busbar connection must be tightened to the exact OEM torque specification (typically 12-15 Nm for M8 bolts) using a calibrated digital torque wrench. Apply dielectric grease to prevent oxidation in the cleanroom environment.
- Kelvin Connection Integrity: Formation equipment uses 4-wire Kelvin sensing to measure cell voltage independent of the current-carrying leads. Check the crimp connections on the sensing wires. A loose sensing wire will cause the power supply to overcompensate, leading to dangerous overvoltage conditions that can vent the battery cells.
- AC Power Phase Balancing: Verify that the three-phase AC supply to the formation racks is balanced within 2%. An unbalanced supply forces the rectifiers to work harder, generating excess heat and reducing the regenerative braking efficiency when the cells discharge back into the grid.
Foundation Curing and Active Vibration Cancellation
Finally, the physical foundation of the equipment cannot be rushed. Stacker and winder machines are highly susceptible to low-frequency floor vibrations caused by nearby forklifts or stamping presses. When pouring the isolated concrete inertia pads for this lithium ion battery manufacturing equipment, use a high-early-strength, non-shrink grout. The pad must cure for a minimum of 14 days before the machine is bolted down. For facilities with severe ambient vibration, integrating active pneumatic vibration isolators beneath the winder baseplate is no longer optional—it is a requirement to maintain the ±0.1mm stacking alignment tolerance demanded by modern high-energy-density cells.
According to the U.S. Department of Energy's battery manufacturing guidelines, maintaining strict environmental and mechanical tolerances during the manufacturing process is directly correlated to the lifecycle and safety of the final battery cell. Relocation introduces variables that must be aggressively controlled to prevent latent defects.
Furthermore, adherence to rigorous material handling and rigging standards, as outlined by OSHA's Material Handling protocols, is essential not just for personnel safety, but for preventing the micro-fractures in machine castings that lead to chronic misalignment. For deeper insights into advanced manufacturing facility design, refer to the NIST Advanced Manufacturing programs, which provide foundational data on precision metrology and factory floor dynamics.
By treating the relocation of battery manufacturing lines as a precision metrology exercise rather than a simple logistics move, plant managers can avoid months of yield debugging and achieve nameplate capacity within weeks of commissioning.