Troubleshooting Puma CNC Machine Coolant & Enclosure Leaks
Diagnose and fix coolant leaks, way cover failures, and enclosure seal degradation on DN Solutions Puma CNC lathes with this step-by-step repair guide.
Primary Failure Modes in DN Solutions Puma Enclosures
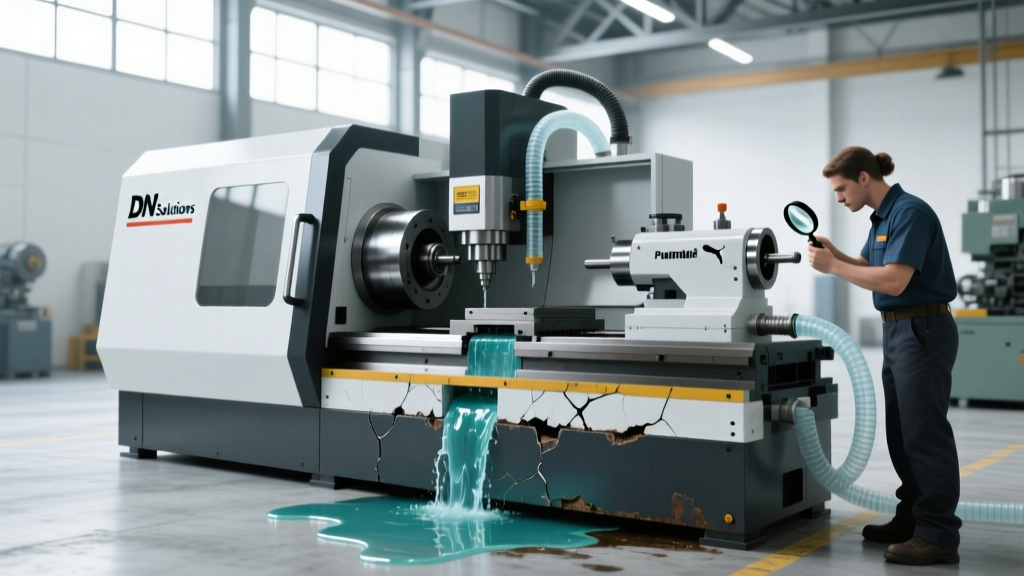
The DN Solutions (formerly Doosan) Puma series, including the Puma 2100, 2600, and 3100 turning centers, utilizes a heavy-duty slanted bed design optimized for aggressive chip evacuation. While this geometry aids in gravity-assisted chip flow, it places unique thermal and mechanical stresses on the machine enclosure and coolant containment systems. Coolant leaks in these machines typically originate from three specific failure modes: front door bulb seal compression set, telescopic way cover wiper degradation, and spindle rotary union seal blowouts.
When synthetic or semi-synthetic metalworking fluids interact with standard neoprene enclosure seals over extended periods, the rubber undergoes chemical swelling and loses its elastic memory. This results in a compression set where the seal no longer rebounds against the door frame, allowing high-velocity coolant mist and liquid to escape the machining envelope. According to NIOSH guidelines on metalworking fluids, uncontrolled coolant misting not only creates slip hazards but exposes operators to respiratory irritants, making immediate enclosure repair a critical safety compliance issue.
WARNING: High-Pressure Coolant HazardMany Puma 2600 and 3100 models are equipped with optional high-pressure coolant systems operating at 70 bar (1,000 psi) to 120 bar (1,740 psi). Before opening any enclosure panels, inspecting way covers, or disconnecting coolant lines, you must fully depressurize the system via the accumulator bleed valve and lock out the high-pressure pump motor. Injected coolant can cause severe tissue damage.
Coolant System Diagnostics: Pump, Nozzles, and Rotary Unions
Troubleshooting a coolant issue requires isolating whether the failure is volumetric (loss of fluid), pressure-related (loss of GPM/PSI), or containment-related (leaking from the envelope). Begin by checking the coolant concentration using an optical refractometer. The Puma series performs optimally with a 6% to 8% concentration of semi-synthetic fluid. Concentrations below 5% accelerate the corrosion of the way cover wiper seals and the internal cast iron surfaces of the chip tray.
| Puma Model | Standard Tank Capacity | Base Pump Pressure | High-Pressure Option |
|---|---|---|---|
| Puma 2100 Series | 180 Liters (47 Gal) | 3.5 bar (50 psi) | 70 bar (1,000 psi) |
| Puma 2600 Series | 250 Liters (66 Gal) | 4.0 bar (58 psi) | 70 / 120 bar |
| Puma 3100 Series | 320 Liters (84 Gal) | 4.5 bar (65 psi) | 120 bar (1,740 psi) |
Step-by-Step Spindle Coolant Union Rebuild
If you observe coolant weeping from the rear of the spindle housing or a sudden drop in through-tool coolant pressure, the rotary union mechanical seal has likely failed. Coolant bypassing this seal will enter the spindle bearing housing, leading to catastrophic bearing failure—a repair exceeding $15,000.
- Isolate and Disconnect: Shut off the high-pressure pump. Disconnect the coolant supply line from the union housing and cap the line to prevent system drainage.
- Remove the Union: Unbolt the anti-rotation torque arm. Carefully unscrew the union retaining nut (typically a 45mm or 50mm spanner size depending on the spindle bore). Slide the union off the spindle drawbar.
- Inspect the Seal Faces: The rotary union relies on lapped carbon and ceramic seal faces. If you feel any grit or notice scoring on the ceramic face, the entire seal cartridge must be replaced. Do not attempt to sand or polish the faces.
- Replace O-Rings and Reassemble: Lubricate all new Viton O-rings with clean silicone grease. Slide the rebuilt union back onto the drawbar, ensuring the anti-rotation pin aligns with the slot.
- Test for Spindle Intrusion: Before reinstalling the spindle motor belts, pressurize the coolant system to 20 bar and run the spindle at 500 RPM for 10 minutes. Inspect the spindle labyrinth seals for any moisture ingress.
Enclosure Seal and Way Cover Replacement
The telescopic steel way covers on the X and Z axes protect the precision linear guide rails from abrasive cast iron and steel chips. Each cover segment features a polyurethane wiper seal. When these wipers harden or tear, chips are dragged underneath the covers, scoring the rails and causing axis servo following errors.
Material Selection for Door Gaskets
When replacing the front sliding door gasket on a DN Solutions Puma 2600 or similar model, material selection dictates the lifespan of the repair. Standard neoprene bulb seals degrade within 12 to 18 months when exposed to modern semi-synthetic coolants. Instead, source an EPDM (Ethylene Propylene Diene Monomer) rubber bulb seal with a 70A durometer rating. EPDM offers superior chemical resistance to alkaline coolant additives and maintains its compression set characteristics across the 15°C to 45°C thermal cycling range typical of a Puma enclosure.
Repair Cost Estimates (2026 Pricing)• Front Door EPDM Bulb Seal Kit: $180 - $260
• Z-Axis Telescopic Way Cover Assembly (OEM): $2,400 - $3,800
• Spindle Rotary Union Rebuild Kit: $450 - $850
• Coolant Tank Tramp Oil Skimmer Replacement: $600 - $950
Chip Conveyor and Tank Overflow Troubleshooting
A frequent misdiagnosis of 'enclosure leaks' is actually a coolant tank overflow caused by chip conveyor blockages. The Puma series utilizes a slanted chip tray that feeds into a hinge-belt or scraper-type chip conveyor. If fine aluminum or stringy stainless steel chips wrap around the conveyor head shaft, the belt tension increases, triggering the torque limiter clutch. When the conveyor stops, chips dam up in the tray, blocking the coolant return weep holes. The rising coolant level eventually overflows the tray dam and floods the machine base.
To resolve this, remove the conveyor access cover at the rear of the machine. Check the shear pin or torque limiter clutch on the drive motor. If the clutch is slipping, clean the head shaft and adjust the conveyor chain tension to allow exactly 15mm to 20mm of deflection at the midpoint of the return run. Ensure the coolant return screen inside the tank is cleared of sludge, as a blinded screen will restrict fluid flow back to the pump suction, causing pump cavitation and localized flooding inside the enclosure.
Preventative Maintenance Matrix
Implementing a strict preventative maintenance schedule prevents minor seal degradations from escalating into axis contamination or spindle destruction. Use the following matrix to structure your facility's maintenance routing for the Puma series.
| Interval | Component | Action Required | Tool / Metric |
|---|---|---|---|
| Weekly | Coolant Sump | Check concentration and tramp oil levels | Optical Refractometer (Target 6-8%) |
| Monthly | Way Cover Wipers | Inspect for tearing; clean chip buildup | Flashlight, Nylon Scraper |
| Quarterly | Enclosure Door Seals | Check for compression set and misting | Visual / Tactile Inspection |
| Bi-Annually | Chip Conveyor Drive | Inspect torque limiter, grease bearings | NLGI #2 Grease, Tension Gauge |
| Annually | Spindle Rotary Union | Test for weeping; replace O-rings if needed | Pressure Test Gauge (20 bar) |
Addressing enclosure and coolant system faults on Puma CNC lathes requires moving beyond simple fluid top-offs. By systematically diagnosing rotary union seal integrity, upgrading enclosure gaskets to chemically resistant EPDM, and maintaining precise chip conveyor tension, maintenance teams can eliminate coolant leaks, protect high-value linear guides, and ensure operator safety on the shop floor.