Troubleshooting Rigidity and Chatter in Machine Tools Milling
Diagnose and fix chatter, vibration, and rigidity issues in machine tools milling. Learn retention knob specs, toolholder runout limits, and dampening fixes.
Identifying the Root Cause of Milling Vibration
Vibration in machine tools milling operations is not a single phenomenon; it is a complex interaction between the spindle, toolholder, cutting tool, and workpiece. Unchecked regenerative chatter degrades surface finish beyond 63 µin Ra, accelerates flank wear by up to 50%, and can fracture the micro-grains of solid carbide end mills. To restore rigidity and eliminate chatter, shop floor technicians must move beyond trial-and-error feeds and speeds and systematically isolate the mechanical weak link in the machining system.
CRITICAL WARNING: Never attempt to fix structural chatter simply by reducing the spindle speed or increasing the feed rate without first verifying the mechanical integrity of the toolholder interface. Masking a rigidity failure with parameter changes will inevitably lead to catastrophic tool pullout during heavy radial engagement.Vibration Diagnostic Matrix
Use the following frequency and symptom matrix to narrow down the source of vibration before adjusting CAM toolpaths. You can identify these frequencies using a simple smartphone accelerometer app mounted magnetically to the spindle housing or workpiece fixture.
| Frequency Range | Audible / Visual Symptom | Primary Mechanical Suspect | Immediate Corrective Action |
|---|---|---|---|
| 50 - 150 Hz | Low-pitch hum; heavy machine shaking; poor floor finish. | Workpiece fixturing, vise droop, or machine leveling pads. | Re-torque vise bolts to 80 Nm; verify fixture contact points; inject epoxy dampening. |
| 150 - 400 Hz | Rattling or clanking; visible toolholder deflection. | Spindle drawbar fatigue, mismatched retention knobs, or worn spindle tapers. | Measure drawbar pull force; inspect pull stud seating; clean spindle taper with isopropyl alcohol. |
| 400 - 1,200 Hz | High-pitch squeal; severe chatter marks on workpiece walls. | Toolholder TIR (runout), collet slippage, or excessive tool overhang (L/D ratio > 4:1). | Switch to shrink-fit or hydraulic toolholder; reduce stick-out; verify ER nut torque. |
| > 1,200 Hz | Whistling sound; micro-chipping on carbide cutting edges. | Workpiece thin-wall resonance or harmonic tool deflection. | Apply low-melting-point alloy support; utilize variable pitch/helix end mills; perform tap testing. |
The Spindle Drawbar and Retention Knob Bottleneck
The most frequently overlooked source of rigidity loss in machine tools milling setups is the retention knob (pull stud) and the spindle's Belleville washer stack. The drawbar's sole purpose is to pull the toolholder taper tightly into the spindle taper to create a rigid, unified mass. If this clamping force degrades, the toolholder 'breathes' (micro-lifts) during cutting, destroying rigidity.
Verifying Drawbar Pull Force
Over years of thermal cycling and mechanical shock, Belleville washers fatigue and lose their spring rate. A healthy CNC spindle must maintain specific pull forces based on the taper size:
- CAT40 / BT40: Minimum 2,500 lbs (ideal: 3,000 lbs)
- CAT50 / BT50: Minimum 4,000 lbs (ideal: 4,500 - 5,000 lbs)
- HSK-A63: Minimum 4,000 lbs clamping force on the dual-contact face and taper.
Use a calibrated drawbar force gauge (such as those from Parlec or Command Tooling) annually. If your CAT40 spindle reads below 2,200 lbs, the Belleville stack must be replaced immediately. According to the Society of Manufacturing Engineers (SME), operating with degraded drawbar force is the leading cause of premature spindle bearing wear, as the vibration transfers directly into the precision angular contact bearings.
The Retention Knob Mismatch Hazard
Using the wrong retention knob geometry is a catastrophic rigidity killer. For example, installing a 45-degree Haas-style pull stud into a 90-degree Mori Seiki or Mazak spindle taper will result in the knob bottoming out before the toolholder taper fully seats. This creates a 'false seat' that reduces effective rigidity by up to 40% and causes severe high-frequency chatter. Always verify the exact OEM part number for your specific machine's pull stud requirement.
Toolholder Selection and Runout Tolerances
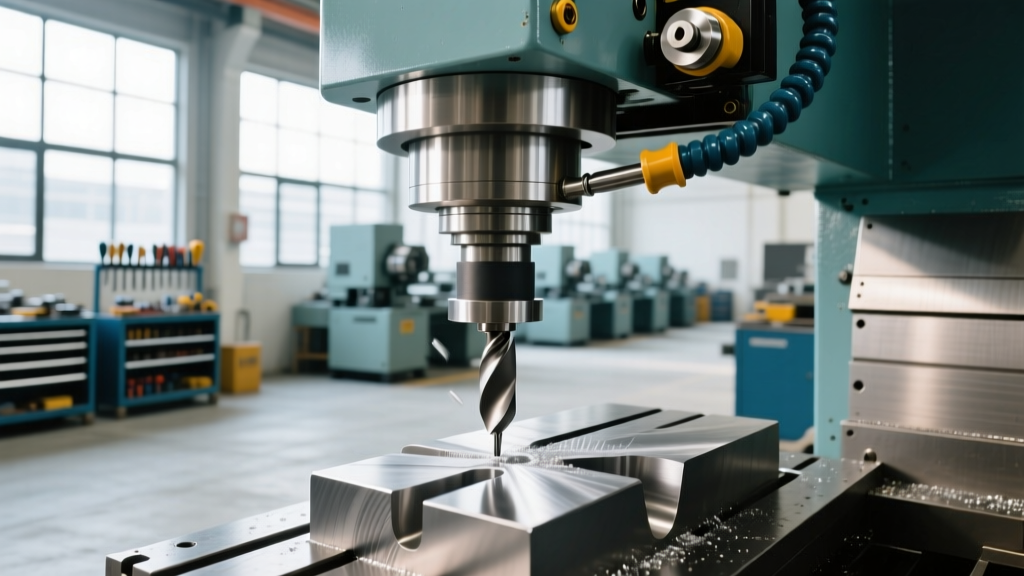
When mechanical interfaces are verified, the next variable is the toolholder's inherent rigidity and Total Indicator Runout (TIR). In machine tools milling, especially when utilizing high-speed machining (HSM) trochoidal toolpaths, TIR directly dictates tool life and chatter propensity.
EXPERT INSIGHT: A mere 0.0002 inches (5 microns) of additional TIR at the tool tip can reduce end mill life by 50% when machining hardened steels (>45 HRC). Always measure runout at 3x the tool diameter, not just at the collet nose.Toolholder Rigidity Comparison
| Toolholder Type | TIR at 3xD (Typical) | Dampening Capacity | Best Application |
|---|---|---|---|
| ER Collet Chuck | 10 - 15 µm | Low | Roughing, drilling, low-speed profiling. |
| Hydraulic Chuck | 3 - 5 µm | High (oil chamber) | Finish milling, reaming, high-speed aluminum. |
| Milling Chuck (e.g., Mega ER) | 5 - 8 µm | Medium | Heavy roughing, high radial engagement. |
| Shrink-Fit | < 3 µm | Very Low | Hard milling, 5-axis simultaneous, deep cavity. |
If you are experiencing high-frequency chatter (400+ Hz) with an ER collet setup, verify your torque. An ER32 nut requires 80 to 100 Nm of torque to properly collapse the collet and eliminate micro-slippage. Use a dedicated torque wrench with a friction-bearing nut to ensure accurate clamping. For operations requiring extreme rigidity, transition to a shrink-fit holder, which provides a uniform 360-degree clamping force and the lowest possible TIR, as detailed in the Sandvik Coromant Milling Knowledge Base.
Workholding and Harmonic Dampening Strategies
When the machine, spindle, and toolholder are rigid, the workpiece itself often becomes the weakest link. Thin-walled components, aerospace structural ribs, and deep pockets act as tuning forks, amplifying cutting forces into severe regenerative chatter.
Step-by-Step Fix for Thin-Wall Chatter
- Apply Temporary Mass: Pack the internal cavity of the thin-wall part with low-melting-point alloy (e.g., Cerrobend) or high-density paraffin wax. This adds mass and alters the natural frequency of the part, shifting it out of the chatter zone.
- Optimize Cutter Geometry: Switch to a variable pitch and variable helix end mill. The unequal spacing of the flutes disrupts the harmonic frequency, preventing the regenerative wave from forming on the workpiece surface.
- Adjust Radial Depth of Cut (RDOC): Chatter often peaks at specific radial engagements. If you are cutting at 50% RDOC and experiencing chatter, drop to 10% RDOC (using HSM adaptive clearing) or increase to 70% RDOC to stabilize the cutting forces.
- Utilize Tuned Mass Dampers: For extended reach milling (L/D ratios > 5:1), standard solid carbide tools will deflect uncontrollably. Invest in anti-vibration boring bars or milling adapters equipped with internal tungsten mass dampers, which absorb kinetic energy before it reaches the cutting edge.
Advanced Troubleshooting: Tap Testing and Stability Lobe Diagrams
For high-value production environments where chatter persists despite mechanical optimizations, implement tap testing. This involves striking the assembled tool and workpiece with an instrumented impact hammer while an accelerometer records the Frequency Response Function (FRF).
Software such as CUTPRO or Machine Vibe analyzes the FRF to generate a Stability Lobe Diagram (SLD). The SLD maps out 'safe' spindle speeds and axial depths of cut where the natural frequencies of the tool and workpiece cancel out rather than amplify each other. By tuning your CAM software to output spindle speeds that land precisely in the 'stable pockets' of the lobe diagram, you can often increase material removal rates (MRR) by 200% while completely eliminating chatter. This data-driven approach transforms machine tools milling troubleshooting from an art into an exact, repeatable science.