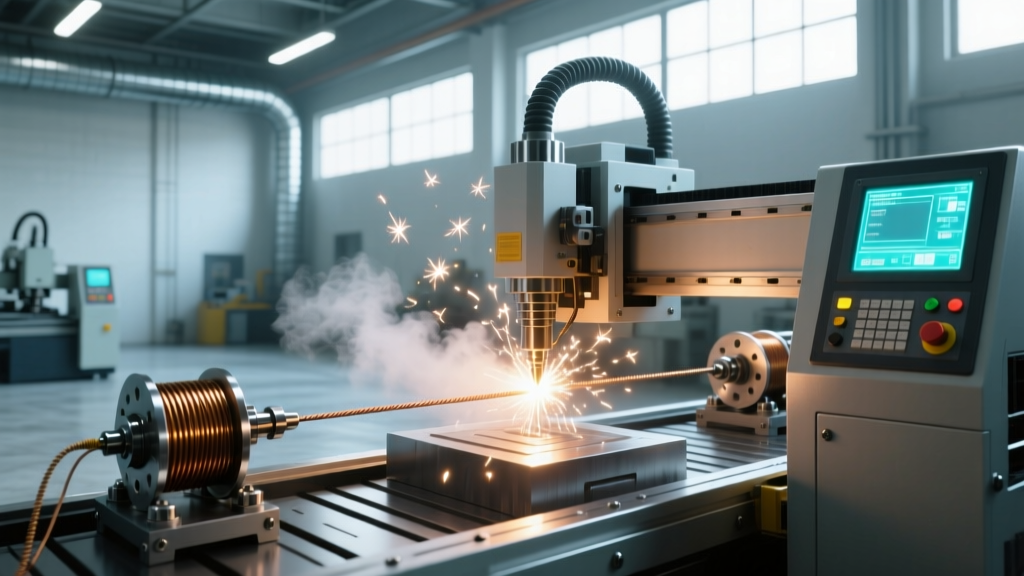
Troubleshooting EDM Machine Tools: Fixing Wire Breakage and Arcing
Expert troubleshooting for EDM machine tools. Fix wire EDM breakage, sinker arcing faults, and dielectric flushing issues with exact parameter adjustments.
Diagnosing Critical Faults in EDM Machine Tools
Electrical discharge machining relies on precisely controlled electrical sparks to erode conductive materials. When EDM machine tools experience wire breakage, auto-threader failures, or sinker arcing, the root cause almost always traces back to imbalances in thermal dynamics, dielectric flushing, or servo-gap parameters. Modern machines like the Makino U6 or Sodick ALN600G feature advanced adaptive controls, but they cannot compensate for mechanical wear or fundamentally incorrect parameter setups. This guide provides exact diagnostic pathways and parameter adjustments to resolve the most disruptive faults in wire and sinker EDM operations.
Warning: Never bypass machine interlocks or increase peak current (Ip) beyond manufacturer limits to force a cut through an arcing condition. This will permanently damage the power supply transistors and destroy the workpiece surface integrity.Wire EDM Machine Tools: Resolving Wire Breakage and Deflection
Wire breakage during the cut or auto-threading sequence is the most common downtime trigger in wire EDM machine tools. Breakage is rarely a random event; it is a symptom of mechanical misalignment, improper tension, or flushing imbalance.
1. Wire Tension and Guide Wear Diagnostics
Wire tension must be matched exactly to the wire diameter and coating type. Running coated wires at brass wire tension settings will cause immediate snapping during the annealing phase.
- Standard Brass Wire (0.25mm): Set tension to 8–10 Newtons (N).
- Coated/Annealed Wire (0.25mm): Set tension to 12–15 N. Coated wires (e.g., Xabolan or Megacut) have higher tensile strength and require higher tension to prevent bowing in thick cuts.
- Fine Wire (0.10mm): Set tension to 2–4 N. Use a calibrated tension gauge; relying solely on the machine's digital readout can be misleading if the magnetic brake is degraded.
Diagnostic Check: Inspect the upper and lower diamond guides. If the wire exhibits lateral deflection greater than 0.003mm when pushed gently with a stylus under standard tension, the guide bearings or the diamond aperture are worn. Replacement diamond guides typically cost between $400 and $800 each and should be swapped in pairs to maintain vertical alignment.
2. Flushing Pressure Imbalance
When cutting parts thicker than 100mm, excessive flush pressure causes the wire to bow, leading to short circuits and subsequent breakage. The dielectric fluid must cool the gap without physically displacing the wire.
- Thin Parts (<50mm): Upper and lower flush pressure at 1.2–1.5 MPa.
- Thick Parts (>100mm): Reduce flush pressure to 0.6–0.8 MPa. Ensure the upper and lower nozzles are within 0.05mm of the workpiece surface. If a gap exists, the fluid will turbulence rather than flow linearly through the kerf.
Auto-Threader Pneumatic and Mechanical Failures
Auto-threader failures on modern wire EDM machine tools usually manifest as the wire missing the lower guide or failing to pass through the start hole. This is a mechanical and pneumatic issue, not a software glitch.
- Annealer Calibration: The wire must be annealed to a precise diameter to pass through the lower guide. If the annealing current is too high, the wire becomes brittle and snaps when the chopper blade strikes. If too low, the wire remains stiff and bends. Check the annealing time; for 0.25mm wire, it should be exactly 0.8 to 1.2 seconds.
- Chopper Blade Wear: The chopper blade must cut the wire at a sharp 45-degree angle. A dull blade leaves a burr that catches in the lower guide. Replace the chopper blade every 5,000 threading cycles or when the cut angle degrades below 30 degrees.
- Pneumatic Pressure: The air jet that shoots the wire downward requires exactly 0.5 MPa (72 PSI) of clean, dry air. If your shop's compressor experiences pressure drops, the wire will stall mid-thread. Install a dedicated 5-micron air filter and regulator directly at the machine's air intake.
Sinker EDM Machine Tools: Eliminating Arcing and Short-Circuit Faults
Sinker EDM (ram EDM) machine tools are highly susceptible to arcing when machining deep cavities or using fine-detail graphite electrodes. Arcing occurs when the spark gap becomes saturated with debris, causing the electrical discharge to concentrate in one spot, melting the electrode and workpiece.
Parameter Adjustment Matrix for Arcing Conditions
When the machine alarms for arcing or you observe a dull, melted surface finish, adjust the parameters according to this matrix. Do not change more than one variable at a time.
| Parameter | Roughing (Graphite) | Finishing (Copper) | Adjustment for Arcing |
|---|---|---|---|
| Pulse Off-Time (Toff) | 15–25 µs | 8–12 µs | Increase by 20% to allow debris evacuation |
| Peak Current (Ip) | 12–24 A | 2–6 A | Decrease by 10-15% to reduce spark intensity |
| Gap Voltage (Vg) | 45–60 V | 80–110 V | Increase by 5V increments to widen the physical gap |
| Servo Sensitivity | High (Fast response) | Low (Smooth response) | Decrease sensitivity to prevent Z-axis hunting |
Optimizing Z-Axis Jump and Flushing Dynamics
In sinker EDM, the Z-axis jump cycle is critical for flushing debris out of the gap. If the machine is arcing in a deep cavity, the jump parameters are likely insufficient.
- Jump Height: Set the jump height to 2mm–5mm. For deep, narrow ribs, increase the jump height to 8mm to create a stronger vacuum effect on the upstroke, pulling fresh dielectric oil into the gap.
- Jump Speed: A slow upstroke and fast downstroke is optimal. Set the upstroke speed to 40% and the downstroke speed to 80%. A fast downstroke creates a high-pressure flushing wave that forces debris out of the bottom of the cavity.
- Suction Flushing: If using a suction flush through the electrode, maintain a vacuum pressure of -0.02 to -0.04 MPa. Exceeding -0.05 MPa will cause the electrode to vibrate, ruining the surface finish and causing dimensional inaccuracy.
Dielectric System and Thermal Stability Troubleshooting
The dielectric medium is the lifeblood of EDM machine tools. Degradation in the dielectric system leads to thermal drift, poor surface finishes, and erratic spark gaps.
Wire EDM: Deionized Water Resistivity
Water resistivity dictates the conductivity of the spark gap. If the resistivity is too high, the machine will struggle to initiate sparks (open circuits). If too low, the water becomes too conductive, causing stray arcing and wire breakage.
- Roughing Cuts: Maintain resistivity between 10–15 µS/cm.
- Finishing Cuts: Drop resistivity to 3–5 µS/cm to stabilize the micro-sparks.
- Resin Bed Maintenance: If the ion exchange resin bed cannot lower the resistivity below 8 µS/cm even after 30 minutes of circulation, the resin is exhausted. A standard 50-liter resin cartridge costs approximately $300–$450 and must be replaced immediately to prevent workpiece rusting and electrolysis.
Sinker EDM: Dielectric Oil Degradation
Sinker EDM requires specialized hydrocarbon dielectric oil (typically ISO VG 10 or VG 22). Over time, the oil accumulates microscopic carbon particles from the graphite electrodes and workpiece erosion.
- Flash Point Check: The flash point of new EDM oil is typically >93°C (200°F). If testing reveals the flash point has dropped below 80°C, the oil is heavily contaminated with fine carbon dust and poses a severe fire hazard. Replace the fluid immediately.
- Filter Micron Rating: Standard paper filters capture down to 10 microns. For fine-finishing sinker operations requiring surface finishes below 0.4 Ra µm, upgrade to 3-micron nominal filters to remove sub-micron carbon sludge that causes micro-arcing.
Chiller and Thermal Drift Prevention
EDM machine tools generate significant heat in the power supply and dielectric fluid. Thermal expansion of the machine casting and Z-axis ball screws will destroy positional accuracy. The dedicated chiller unit must maintain the dielectric fluid at exactly 20°C ± 0.5°C (68°F ± 1°F). If the chiller alarms or the fluid temperature fluctuates by more than 1°C, inspect the chiller's condenser coils for shop dust buildup and verify the refrigerant charge. Operating an EDM machine with a disabled or malfunctioning chiller will result in Z-axis drift of up to 0.015mm over an 8-hour shift, scrapping high-tolerance aerospace and medical components.
Related reading
Robotics Tools Checklist: A Field-Validated, Production-Ready Inventory for Industrial Automation Teams

Milling vs. Manufacturers: Clarifying Roles, Capabilities, and Real-World Supply Chain Impacts